A properly flashed ICF window opening prevents the ingress of rainwater. However, there have been some concerns in the past that a flashed ICF window opening could at some point allow some water to drip into the opening along the embossed cutlines above the opening and beneath the flashing.
If this is a concern of yours, there are two ways to protect your window assemblies against this possibility:
- Use liquid-applied flashing membranes, or
- Implement a kerf cut detail
A kerf cut detail is likely a redundancy in a properly flashed flanged window in most cases, but if redundancy gives you peace of mind, you should definitely consider this approach, as it’s proven to be quite effective.
The article below will detail the evidence behind a kerf cut detail’s ability to provide additional protection against water ingress and walk you through the steps for creating such a detail in an ICF wall
Is a Kerf Cut Detail Effective At Blocking Water Ingress in an ICF Window Assembly?
Yes, a kerf cut detail is an effective way to block water ingress in an ICF wall. A study, conducted by RDH Building Science for BC Housing, assessed six common window installation and bucking methods in ICF walls for their ability to prevent rainwater from getting through the window opening. The study revealed that a window-to-wall interface where a kerf cut allowed the flashing to overlap the ICF insulation panel and extend to the concrete was the most effective at stopping rainwater.
How to Create a Kerf Cut Detail In an ICF Wall
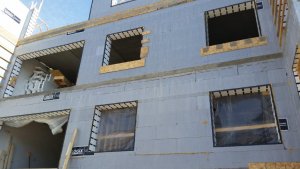
Below are the steps for adding a kerf cut detail as you flash a flanged window. You should commence step one once you’ve installed the sill pan and flashed the jambs per normal procedures.
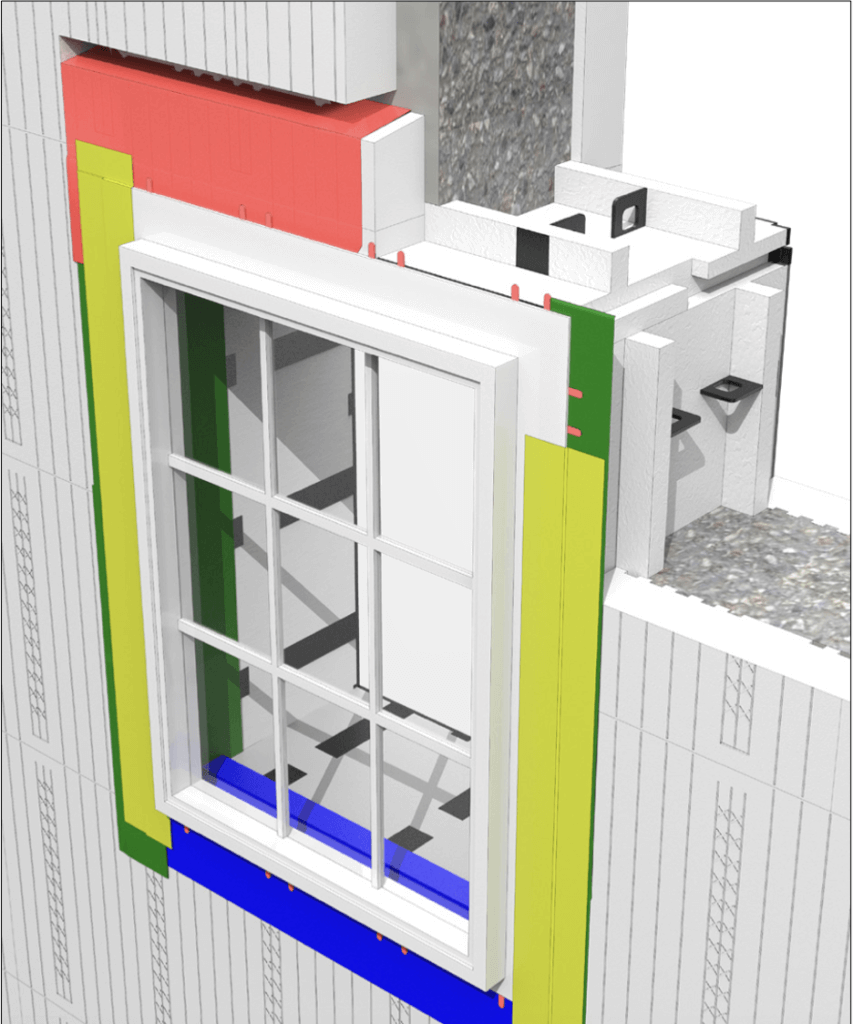
Step 1: Create a Kerf In the ICF Insulation Panel
The first step is to cut out a kerf in the ICF’s exterior panel. To do this, create a horizontal cut in the ICF above the window header. The cut should have a 15-degree slope, and it must extend to the concrete wall beyond the insulation panel.
Step 2: Flash the Header and Kerf
With the cutout made, you must now flash the header and extend the flashing into the kerf, so that it terminates at the surface of the concrete core. A liquid-applied or self-adhering membrane will suit this application.
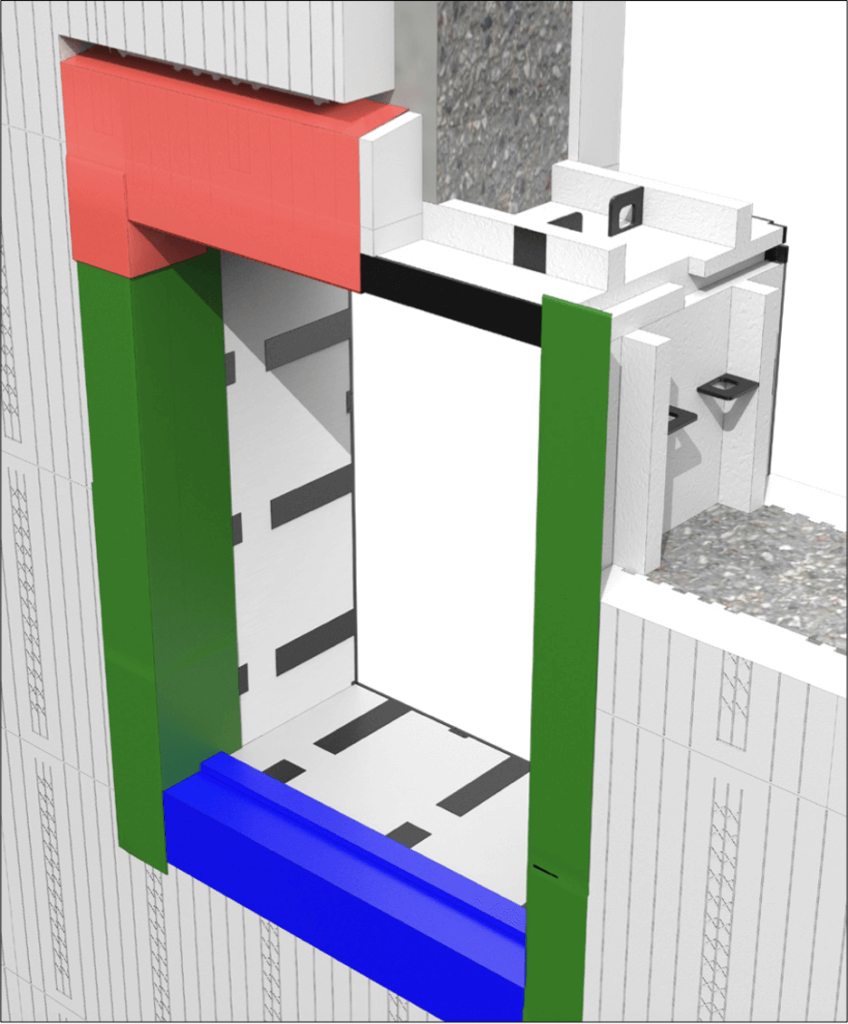
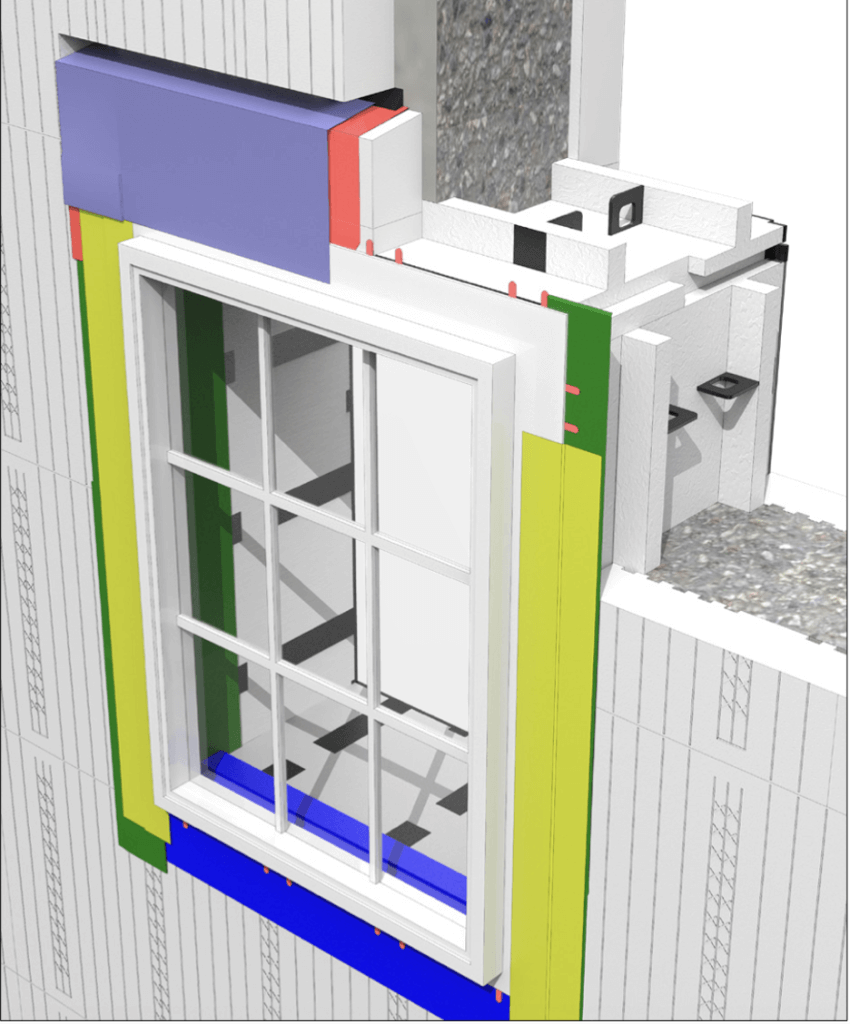
Step 3: Install and Shim the Window
The window opening is now ready, and you can proceed to install the window unit. Once the window is in place, remember to shim it properly.
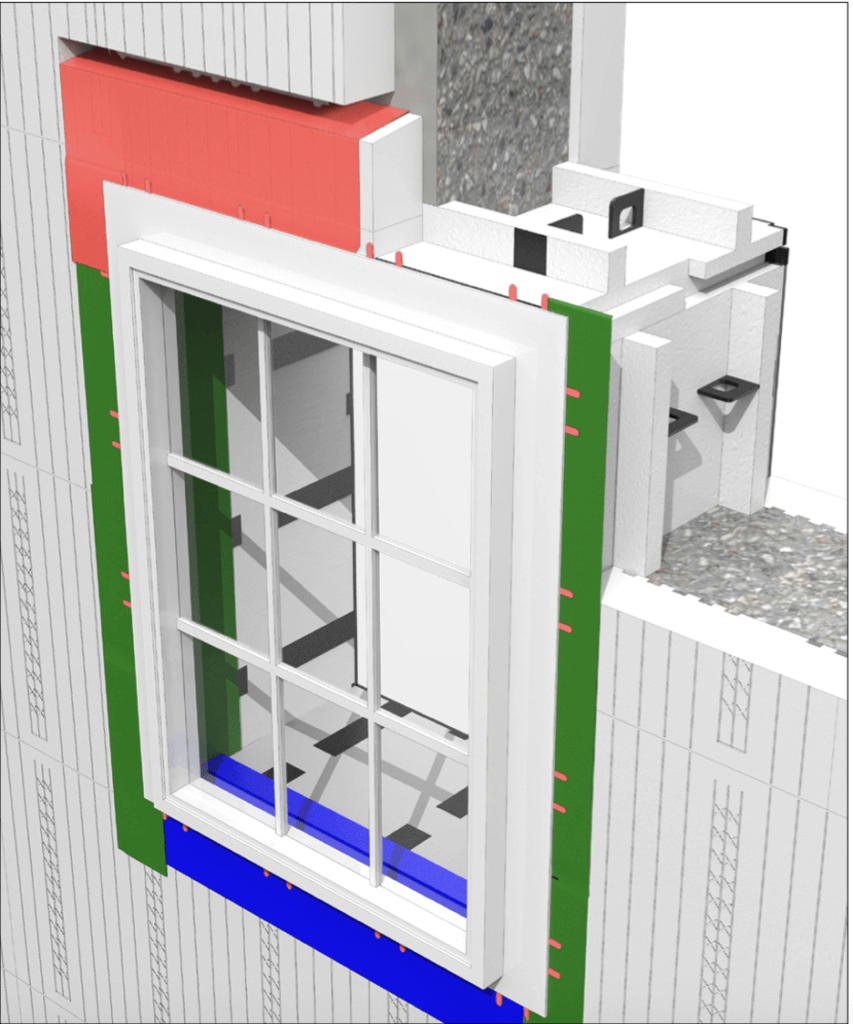
Step 4: Flash the Sides of the Window Flange
With the window set in place and shimmed, your next step is to flash the sides of the window flange. Make sure that the flashing overlaps the entire flange side and the jamb flashing beyond. Again, a self-adhering or liquid-applied membrane will do.
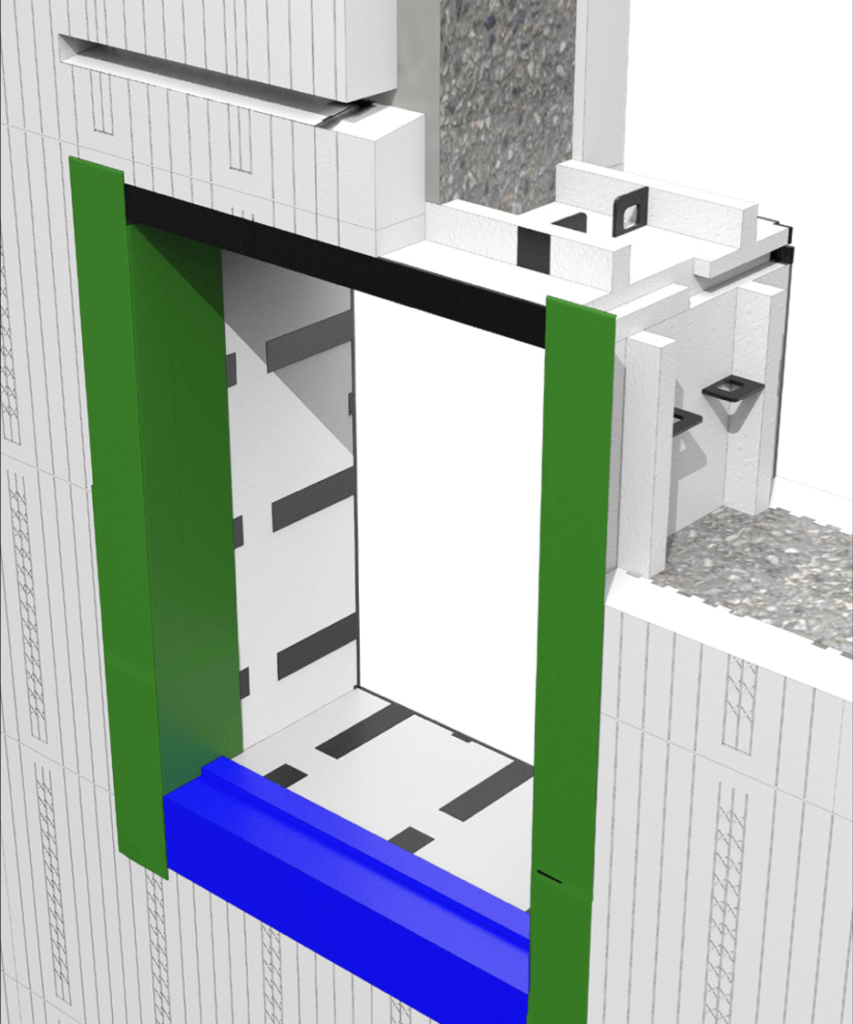
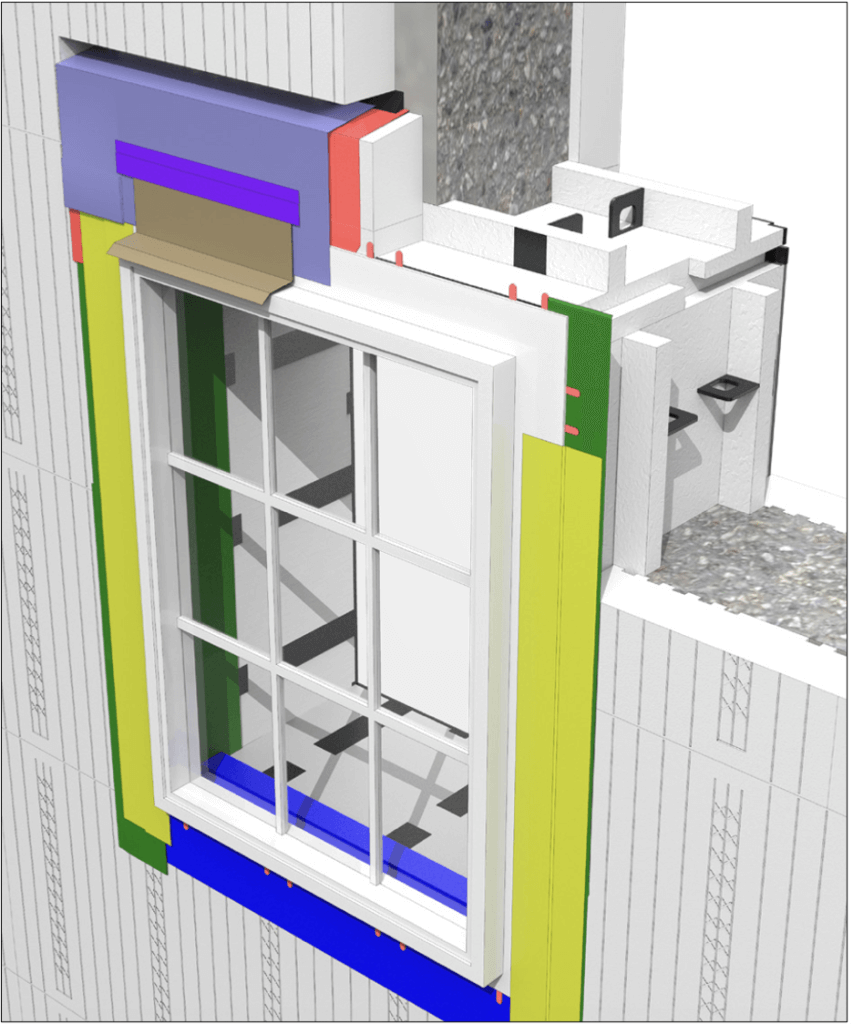
Step 5: Flash the Window Flange at Header
Once the sides of the window flange are flashed, it’s time to repeat the same process at the header flange. Use a self-adhering or liquid-applied membrane, and extend it from the header all the way into the kerf above, such that the flashing terminates at the concrete surface. Seal the flashing-concrete interface with a polymer sealant.
Step 6: Install Cap Flashing
Now, it’s time to install the cap flashing. The cap flashing is an optional step, but when installed will overlap the header flange of the window, sitting directly on the membrane you’ve applied in the previous step.
Don't miss a thing!
Subscribe for the latest in the ICF world, exclusive content, insider industry news and limited edition webcasts.
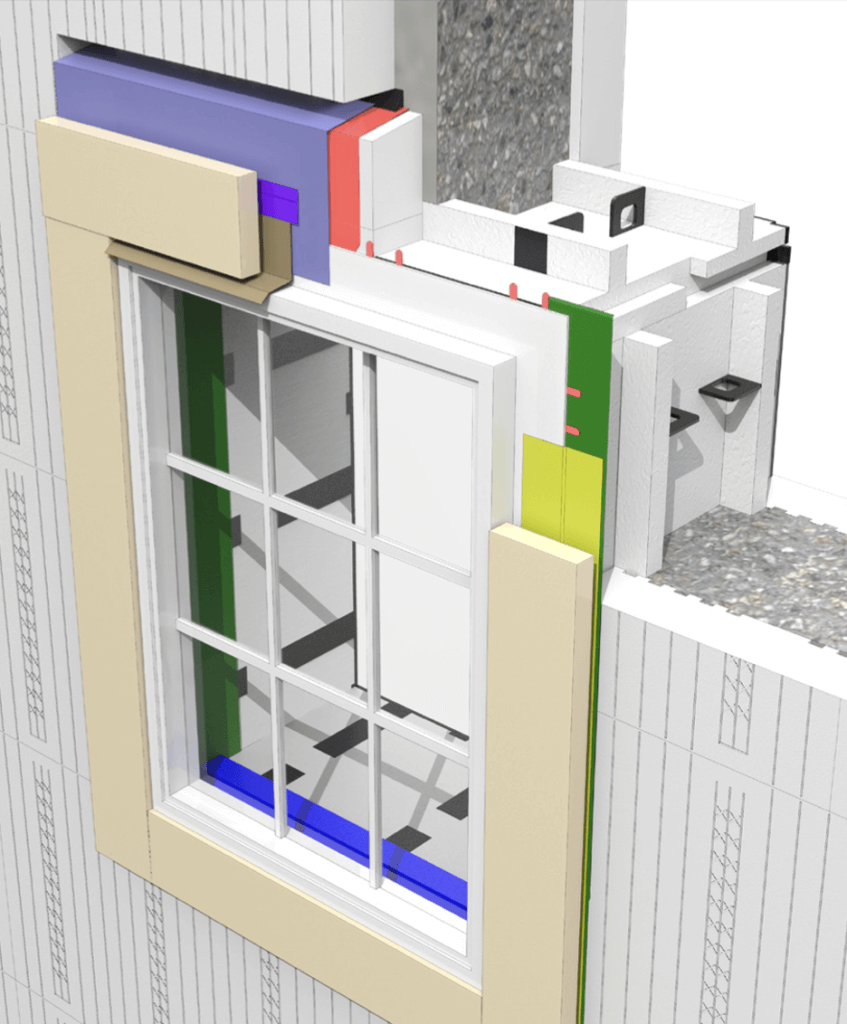
Step 7: Install the Finish Trim
The window and the kerf are now properly flashed, and the final step is to install the finish trim per the design guidelines.
Wrapping It Up
ICF walls are inherently air and watertight, but the window openings are still a weak spot for water ingress. Properly flashing a window in an ICF wall reduces the probability of rainwater getting into the window assembly; however, tests have shown that adding a redundancy such as a kerf cut detail helps mitigate this risk even further. We hope the guide above offers straightforward guidance for creating a kerf cut in your ICF wall, but feel free to contact your Logix territory manager if you have any questions about this procedure.